概述
这篇文章是记录ubuntu系统从头安装k8s及traefik,通过一个小示例完成全部操作。
开始之前,先说明下本次用到的硬件及软件环境:
-
服务器:腾讯云CVM,4核8G,至少4核,核心太少后续 prometheus 和 traefik 都起不来。
-
ubuntu:20.0.4 lts
-
kubernetes:v1.21.5
-
kubesphere:v3.2.0
-
kubekey:v1.2.0
-
traefik:v2.5.4
整体的架构如下:
-
所有的自定义内容都在 demo 这个命名空间下
-
启动一个服务 music,访问时打印 this is music server!
-
启动一个服务 video,访问时打印 this is video server!
-
启用 ingress,定义两个路由
-
music.demo.wcxst.com: 对应 music 服务
-
video.demo.wcxst.com: 对应 video 服务
-
-
启动 traefik,监听 80 和 443 端口
要实现的目标:
- traefik.demo.wcxst.com/dashboard 访问到 video 的 dashboard
- music.demo.wcxst.com 访问到 music 服务
- video.demo.wcxst.com 访问到 video 服务
本文章的所有代码都在 https://github.com/jormin/k8s-traefik-demo 。
开始
解析域名
开始之前先将要用到的三个域名解析到对应的服务器IP:
- traefik.demo.wcxst.com
- music.demo.wcxst.com
- Video.demo.wcxst.com
搞定服务器
测试时,我是在腾讯云买了一个实时计费的4核8G服务器,测试完毕后就释放了,费用一小时¥0.5左右。
配置安全组端口
开始之前先配置下服务器安全组的端口,kubesphere 需要某些端口用于服务之间的通信。如果您的网络配置有防火墙规则,则需要确保基础设施组件可以通过特定端口相互通信。这些端口用作某些进程或服务的通信端点。
| 服务 | 协议 | 行为 | 起始端口 | 结束端口 | 备注 |
|---|---|---|---|---|---|
| ssh | TCP | allow | 22 | ||
| etcd | TCP | allow | 2379 | 2380 | |
| apiserver | TCP | allow | 6443 | ||
| calico | TCP | allow | 9099 | 9100 | |
| bgp | TCP | allow | 179 | ||
| nodeport | TCP | allow | 30000 | 32767 | |
| master | TCP | allow | 10250 | 10258 | |
| dns | TCP | allow | 53 | ||
| dns | UDP | allow | 53 | ||
| local-registry | TCP | allow | 5000 | 离线环境需要 | |
| local-apt | TCP | allow | 5080 | 离线环境需要 | |
| rpcbind | TCP | allow | 111 | 使用 NFS 时需要 | |
| ipip | IPENCAP / IPIP | allow | Calico 需要使用 IPIP 协议 | ||
| metrics-server | TCP | allow | 8443 |
启用root账号
服务器启动后默认是 ubuntu 账号,需要登录后启动 root 账号并设置密码,之后用root登录。
用root操作仅仅是因为方便,没有考虑安全因素,实际情况依据具体情况操作。
# 启动 root
sudo sed -i 's/#PermitRootLogin prohibit-password/PermitRootLogin yes/' /etc/ssh/sshd_config
sudo service sshd restart

# 设置root密码
sudo passwd root
安装软件
设置好密码后退出用root登录,接着进行初始化,安装依赖的常用软件,并且安装 docker、docker-compose、kubernetes、kubesphere 等等,安装时会要求输入两项内容:
- hostname:修改服务器的hostname,这里我设置的是
demo,可以改为自己喜欢的,这个也是 k8s 的节点名称。 - ssh公钥:用于免密登录
脚本如下:
#!/bin/bash

# 设置主机名
echo "1. 设置hostname"
currentHostname=$(hostname)
echo "当前hostname:$currentHostname"
read -p "请输入hostname(直接回车不修改):" hostname
if [ -z "${hostname}" ];then
    hostname=$currentHostname
fi
hostnamectl set-hostname $hostname
echo ""

# 设置sshd
echo "2. 设置sshd"
ssh-keygen -t rsa -N '' -f ~/.ssh/id_rsa
sed -i -e 's/#PubkeyAuthentication yes/PubkeyAuthentication yes/' -e 's/PasswordAuthentication yes/PasswordAuthentication no/' -e 's/#ClientAliveInterval 0/ClientAliveInterval 60/' -e 's/#ClientAliveCountMax 3/ClientAliveCountMax 30/' /etc/ssh/sshd_config
service sshd restart
read -p "请输入免密登录公钥:" pubkey
cat > ~/.ssh/authorized_keys <<EOF
$pubkey
EOF
echo ""

echo "3. 设置时区为 Asia/Shanghai"
sudo timedatectl set-timezone Asia/Shanghai
echo ""

echo "4. 切换阿里源"
sudo cp -ra /etc/apt/sources.list /etc/apt/sources.list.bak
sudo sed -i -e 's#http://cn.archive.ubuntu.com/ubuntu#http://mirrors.aliyun.com/ubuntu#' -e 's#http://mirrors.tencentyun.com/ubuntu#http://mirrors.aliyun.com/ubuntu#' /etc/apt/sources.list
sudo apt-get update
sudo apt-get upgrade
echo ""

echo "5. 关闭防火墙和Selinux"
sudo ufw disable
sudo ufw status
sudo apt install -y policycoreutils
sudo sestatus -v
echo ""

echo "6. 关闭swap"
swapoff -a
echo ""

echo "7. 设置 alias"
echo "alias ll=\"ls -la\"" >> ~/.bash_profile
source ~/.bash_profile
echo ""

echo "8. 安装 docker"
sudo apt-get remove docker docker-engine docker.io containerd runc
sudo apt-get update
sudo apt-get install -y \
    net-tools \
    unzip \
    apt-transport-https \
    ca-certificates \
    curl \
    gnupg \
    lsb-release \
    conntrack
sudo curl -fsSL https://mirrors.aliyun.com/docker-ce/linux/ubuntu/gpg | sudo apt-key add -
sudo add-apt-repository "deb [arch=amd64] https://mirrors.aliyun.com/docker-ce/linux/ubuntu $(lsb_release -cs) stable"
sudo apt-get update
sudo apt-get install -y docker-ce docker-ce-cli containerd.io
mkdir /etc/docker
sudo cat > /etc/docker/daemon.json <<EOF
{
    "exec-opts": ["native.cgroupdriver=systemd"],
    "log-driver": "json-file",
    "log-opts": {
    "max-size": "100m"
    },
    "storage-driver": "overlay2",
    "registry-mirrors":[
        "https://mirror.ccs.tencentyun.com",
        "https://docker.mirrors.ustc.edu.cn",
        "https://registry.docker-cn.com"
    ]
}
EOF
sudo systemctl daemon-reload
sudo systemctl restart docker
sudo systemctl enable docker
echo ""

echo "9. 安装 docker compose"
sudo curl -L "http://download.lerzen.com/docker-compose-Linux-x86_64" -o /usr/local/bin/docker-compose
sudo chmod +x /usr/local/bin/docker-compose
docker-compose --version
echo ""

echo "10. 处理dns"
sed -i 's/#DNS=/DNS=114.114.114.114/' /etc/systemd/resolved.conf
service systemd-resolved restart
systemctl enable systemd-resolved
mv /etc/resolv.conf /etc/resolv.conf.bak
ln -s /run/systemd/resolve/resolv.conf /etc/
echo ""

echo "11. 安装kubernetes和kubesphere"
export KKZONE=cn
curl -sfL https://get-kk.kubesphere.io | VERSION=v1.2.0 sh -
chmod +x kk
./kk create cluster --with-kubernetes v1.21.5 --with-kubesphere v3.2.0
echo ""
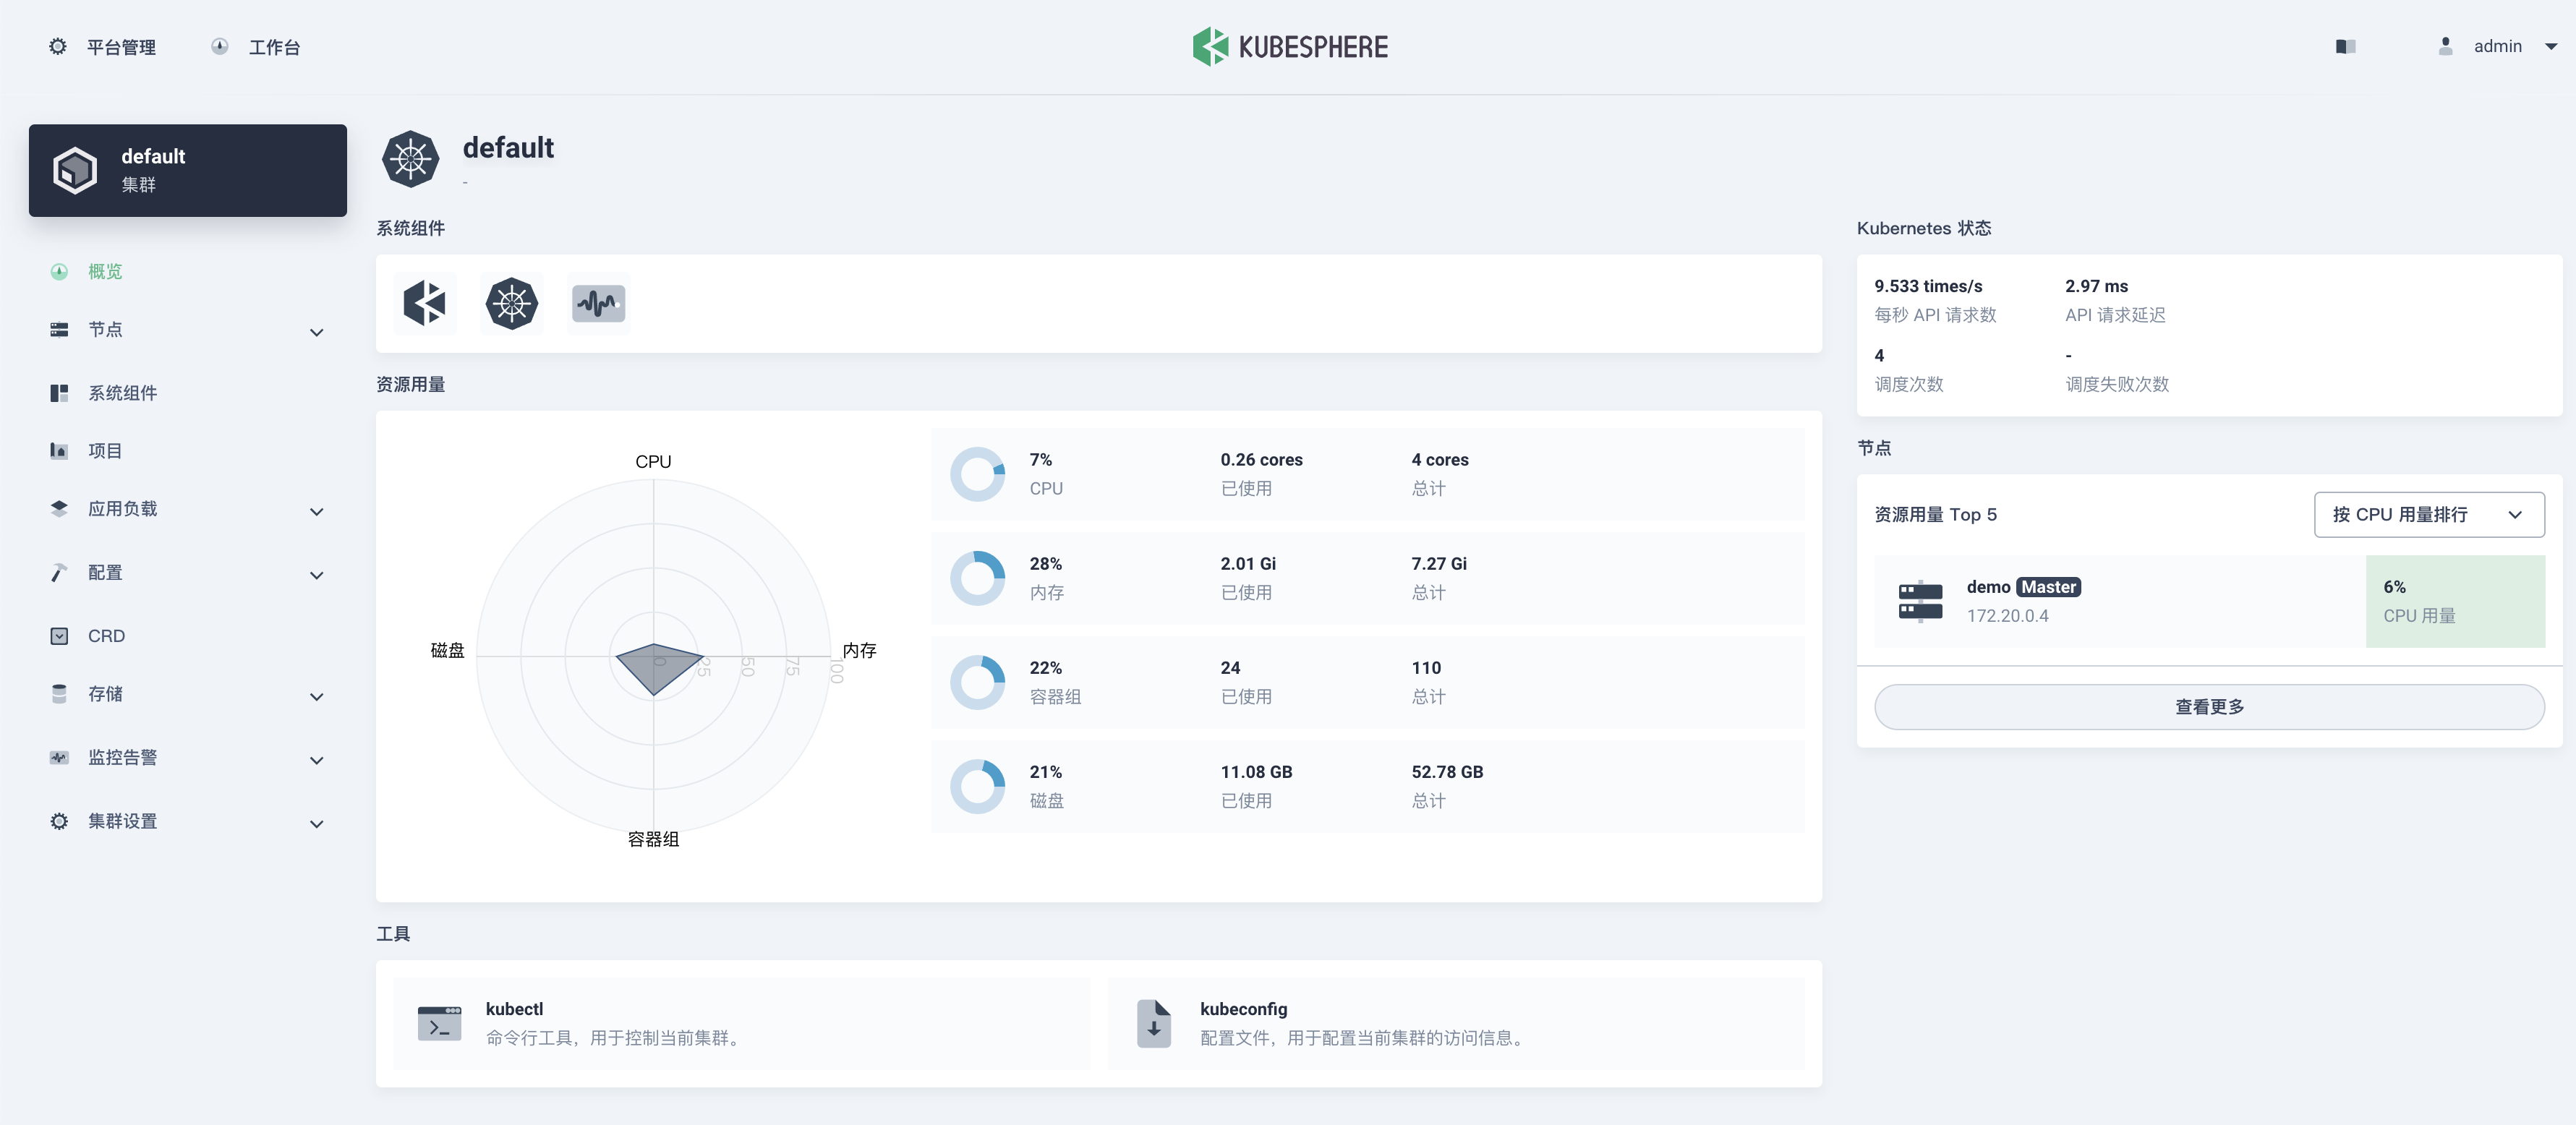
安装完成后访问 [公网ip:30880] 访问 kubesphere,初始账号密码为 admin/P@88w0rd,首次登录会要求重置密码,正常操作即可。
修改 kubenetes 默认端口范围
kubenetes 默认的端口范围为 30000-32767,修改为 1-65535,因为我们后续的 traefik 需要监听 80 和 443 端口,不修改的话会报如下错:
Invalid value: 80: provided port is not in the valid range. The range of valid ports is 30000-32767
修改方法:
编辑 /etc/kubernetes/manifests/kube-apiserver.yaml,找到 –service-cluster-ip-range 这行,在这行下面新增 - –service-node-port-range=1-65535。
vi /etc/kubernetes/manifests/kube-apiserver.yaml
修改后如下:
spec:
  containers:
  - command:
    ...
    - --service-cluster-ip-range=10.233.0.0/18
    - --service-node-port-range=1-65535
    ...
    image: registry.cn-beijing.aliyuncs.com/kubesphereio/kube-apiserver:v1.21.5
    imagePullPolicy: IfNotPresent
    livenessProbe:
重新加载
systemctl daemon-reload
systemctl restart kubelet
创建demo命名空间
服务器上执行 kubectl apply -f namespace.yaml 创建命名空间,配置文件如下:
apiVersion: v1
kind: Namespace
metadata:
  name: demo
两个小服务
上述操作后我们已经有了一个部署好 kubenetes 和 kubesphere 的服务器,接下来我们写两个小服务并部署到 kubenetes 上。
这里仅用于测试,我用 go 写了两个很简单的http服务,分别打印 music 和 video 服务的内容,然后编译打包为镜像上传到 dockerhub,两个镜像我已经上传,可以直接使用:
以下是 music 内容,video 服务类似,修改对应内容即可。
-
main.go
package main import ( "fmt" "net/http" ) // handler 根处理器 func handler(w http.ResponseWriter, r *http.Request) { _, _ = fmt.Fprintf(w, "this is music server!") } func main() { http.HandleFunc("/", handler) _ = http.ListenAndServe(":80", nil) } -
dockerfile
FROM alpine:latest # 设置固定的项目路径 ENV WORKDIR /app # 添加应用可执行文件,并设置执行权限 ADD ./video $WORKDIR/video RUN chmod +x $WORKDIR/video RUN echo -e http://mirrors.ustc.edu.cn/alpine/v3.7/main/ > /etc/apk/repositories \ && apk update \ && apk add tzdata \ && cp /usr/share/zoneinfo/Asia/Shanghai /etc/localtime \ && echo "Asia/Shanghai" > /etc/timezone WORKDIR $WORKDIR CMD ./video -
k8s
service 里面给服务指定了 nodePort,仅仅用于部署 traefik 前验证服务是否正确。
apiVersion: apps/v1
kind: Deployment
metadata:
  name: music
  namespace: demo
spec:
  replicas: 1
  minReadySeconds: 1
  strategy:
    rollingUpdate:
      maxSurge: 1
      maxUnavailable: 0
  selector:
    matchLabels:
      app: music
  template:
    metadata:
      name: music
      labels:
        app: music
    spec:
      containers:
        - name: music
          image: jormin/music:latest
          ports:
            - containerPort: 80
              protocol: TCP
          readinessProbe:
            periodSeconds: 60
            httpGet:
              path: /
              port: 80

---

apiVersion: v1
kind: Service
metadata:
  name: music
  namespace: demo
spec:
  type: NodePort
  selector:
    app: music
  # 端口
  ports:
    - port: 80
      targetPort: 80
      nodePort: 31801
服务器上使用 kubectl apply -f 部署两个服务,部署后如下:

创建 ingress
这里创建了两个路由,music.demo.wcxst.com 和 video.demo.wcxst.com,配置文件如下,使用 kubectl apply -f xxx.yaml 执行即可。
ingress-rbac.yaml
apiVersion: v1
kind: ServiceAccount
metadata:
  name: ingress
  namespace: kube-system

---

kind: ClusterRoleBinding
apiVersion: rbac.authorization.k8s.io/v1
metadata:
  name: ingress
subjects:
  - kind: ServiceAccount
    name: ingress
    namespace: kube-system
roleRef:
  kind: ClusterRole
  name: cluster-admin
  apiGroup: rbac.authorization.k8s.io
ingress.yaml
apiVersion: networking.k8s.io/v1
kind: Ingress
metadata:
  name: traefik-ingress
  namespace: demo
spec:
  rules:
    - host: music.demo.wcxst.com
      http:
        paths:
          - path: /
            pathType: Exact
            backend:
              service:
                name: music
                port:
                  number: 80
    - host: video.demo.wcxst.com
      http:
        paths:
          - path: /
            pathType: Exact
            backend:
              service:
                name: video
                port:
                  number: 80
traefik
这里我们使用 helm 创建 traefik,使用指定的配置文件,命令如下:
# 添加仓库
helm repo add traefik https://helm.traefik.io/traefik
# 更新
helm repo update
#
# 使用配置文件安装
helm install --namespace=demo traefik traefik/traefik -f config.yaml
config.yaml
ports:
  traefik:
    expose: true
  web:
    nodePort: 80
  websecure:
    nodePort: 443
安装完成后,启动dashboard,增加的路由是 traefik.demo.wcxst.com/dashboard,配置文件如下:
apiVersion: traefik.containo.us/v1alpha1
kind: IngressRoute
metadata:
  name: dashboard
  namespace: demo
spec:
  entryPoints:
    - web
  routes:
    - match: Host(`traefik.demo.wcxst.com`) && (PathPrefix(`/dashboard`) || PathPrefix(`/api`))
      kind: Rule
      services:
        - name: api@internal
          kind: TraefikService
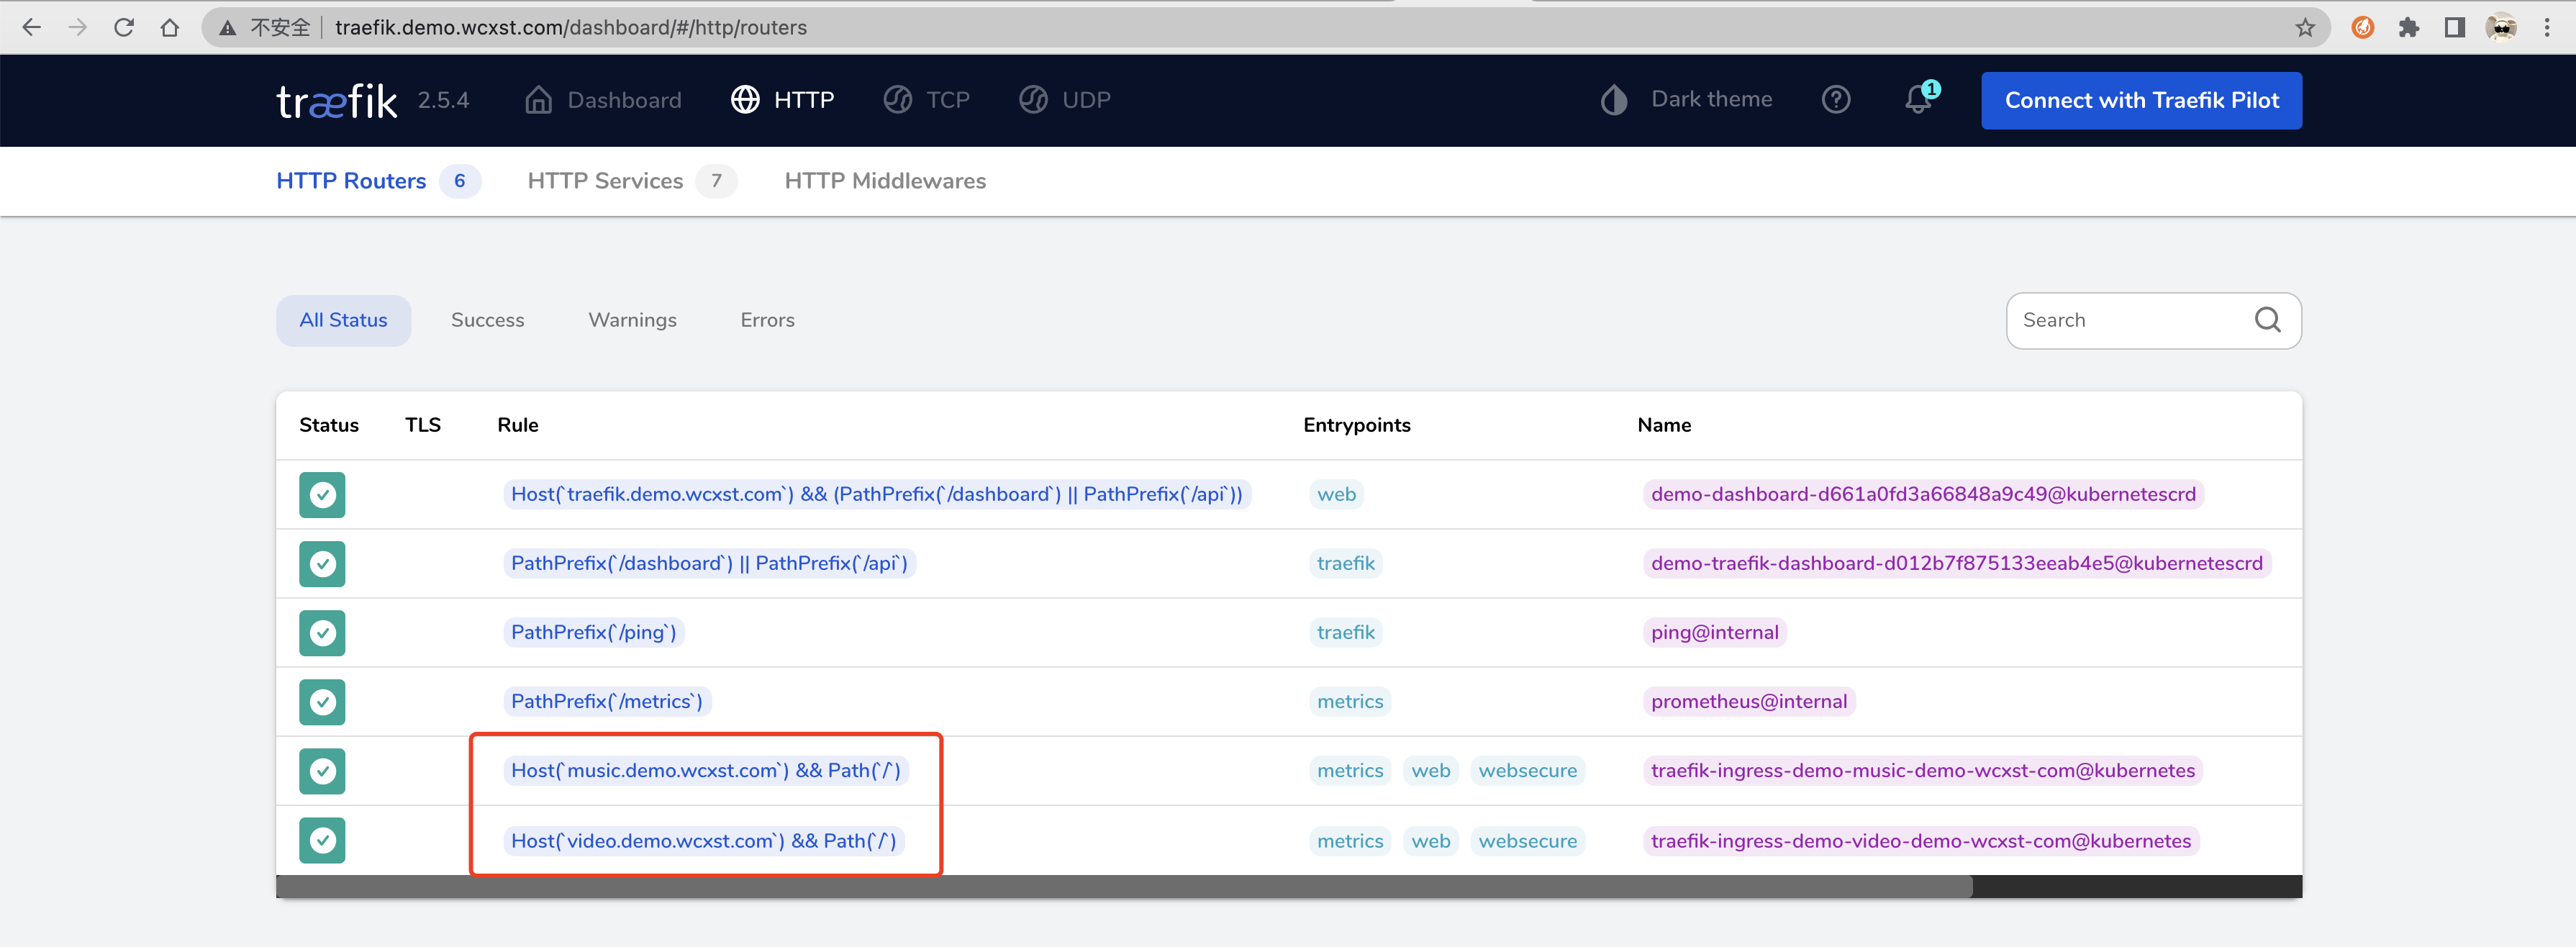
完成后如下图所示:

此时访问 http://traefik.demo.wcxst.com/dashboard 即可看见music 和 video 两个路由
测试
此时访问 music.demo.wcxst.com 和 video.demo.wcxst.com,即可得到预期的响应内容。
➜  ~ curl http://music.demo.wcxst.com
this is music server!%
➜  ~ curl http://video.demo.wcxst.com                                                                                                                                                                   ➜  ~ curl http://video.demo.wcxst.com
this is video server!%                                                                                                                                                                                  ➜  ~

 陕公网安备61011302000990号